Access Management allows Owners and Admins to control who has access to the organisation’s eSignature workspace. From this section, users with the appropriate privileges can add new members, assign roles, manage permissions across various DoxAI platforms, and configure access controls to ensure secure and structured collaboration.
1. User Settings: Adding a New Member
Owners and Admins can add new users to the organisation through the Access Management section.
Steps to Add a Member:
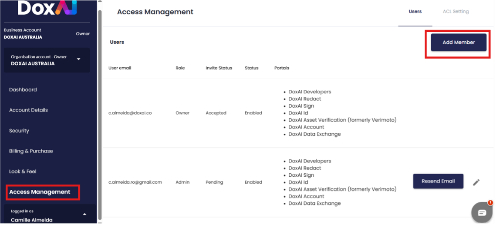
Go to the Access Management tab from the left-hand menu.
Click on the “Add Member” button in the top right.
A pop-up form will appear.
In the pop-up, Add Member Fields:
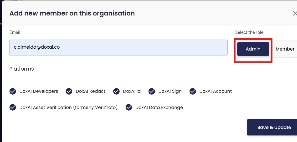
Email: Enter the email ID of the new user.
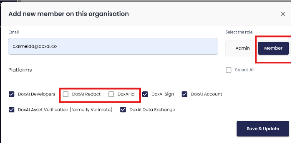
Role: Choose between Admin or Member.
Admin: Automatically receives full access to all DoxAI platforms. No need to select individual platforms.
Member: Requires manual selection of platform(s) to which the user should have access.
Edit User
In the Access Management module, Owners and Admins can edit existing user details to manage their access and role within the platform.
Steps to Edit a User:
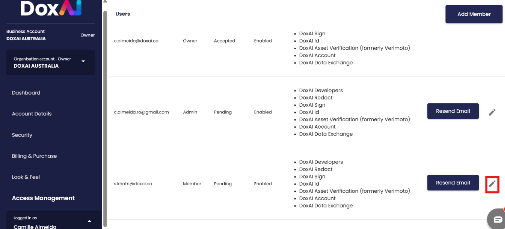
Navigate to Access Management from the sidebar.
Locate the user you want to update in the list.
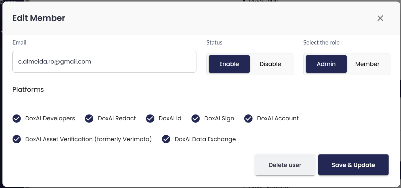
Click the edit icon beside the user’s entry to open the Edit Member modal.
Editable Fields
Within the Edit Member popup, you can:
Update Email – Change the registered email address of the user.
Modify Status – Enable or disable the user account.
Change Role – Switch between Admin and Member roles.
Adjust Platform Access – Add or remove platform access (only applicable to Members).
Delete User – Permanently remove the user from the organisation.
2. ACL Settings (Access Control List)
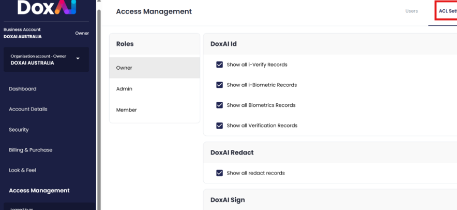
The ACL Settings tab allows fine-grained control over data visibility across different user roles (Owner, Admin, Member) and services within the platform.
Purpose: ACL (Access Control List) settings define whether users in each role can view records associated with specific DoxAI services
How It Works
Navigate to Access Management > ACL Settings.
For each role (Owner, Admin, Member), you will see a list of services.
For each service, toggle the checkbox to:
Enable: Allow users in that role to view service records.
Disable: Restrict users in that role from accessing those records.
Was this article helpful?
That’s Great!
Thank you for your feedback
Sorry! We couldn't be helpful
Thank you for your feedback
Feedback sent
We appreciate your effort and will try to fix the article