Users can streamline the eSignature process by creating reusable templates. These templates can be configured with predefined fields and settings, making it easier to initiate signature requests efficiently.
To create a new template, the user can follow these steps:
In the eSignature dashboard select “Dashboard” then “New Template”
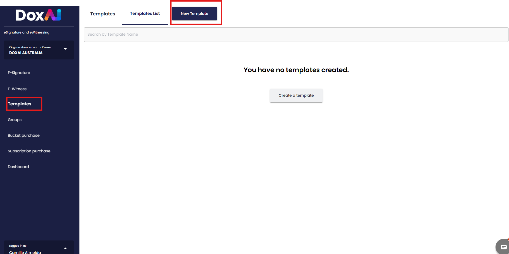
Once redirected to this screen, the user must complete the following steps:
Document Title (Optional): Enter a title for the document, if desired.
Choose a File: Upload the document to be used in the eSignature request by selecting a file from your device.
Click “Next”: Proceed to the next step in the eSignature setup process.
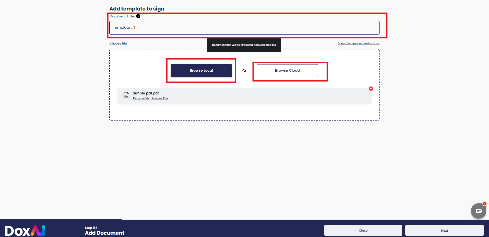
In the following screen, the user is required to define the roles for individuals involved in the signing process. This includes:
Entering a Role Name (e.g., job title, or function)
Selecting whether the role is a Mandatory Signer or a Reviewer
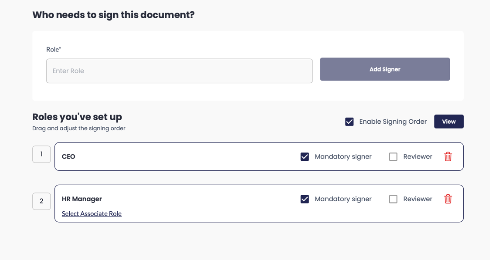
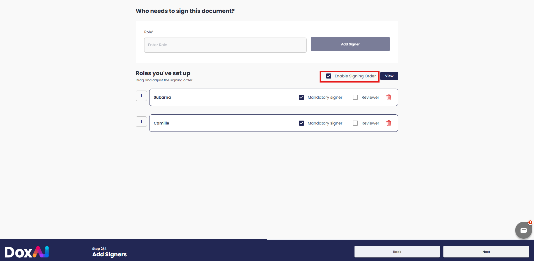
Upon adding more than one role to the eSignature request template the Option to enable the signing order would appear for the user.
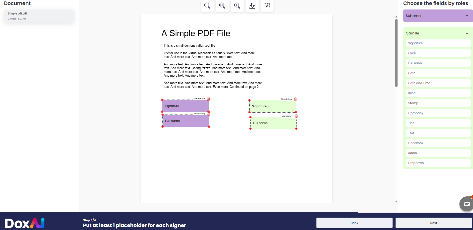
In the following screen, placeholders (e.g., Signature, Full Name, Date) must be assigned to each role defined earlier. To do this, select a role from the dropdown menu on the right, then drag and drop the required fields onto the document.
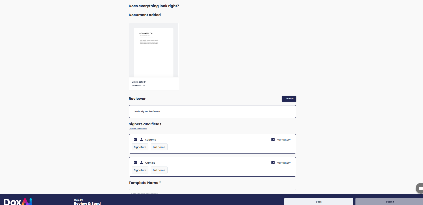
In the following screen, the user can review all details before submitting the eSignature request. This includes confirming signer roles, assigned fields, and optional settings.
Actions Required:
1. Review Document Details: Ensure the uploaded document is correct.
2. Reviewer (Optional): Select a reviewer if needed or proceed without assigning one.
3. Verify Signers & Fields: Confirm that all signers and their required fields are correctly added.
4. Template Name: Enter a name for the template (if applicable).
5. Expiry Settings: Set an expiry date and time for the request.
6. Reminders (Optional): Choose to enable reminder notifications for pending signers.
7. Restrict Fill & Review (Optional): Restrict who can fill or review the document if needed.
8. Once all details are confirmed, click “Submit” to save the eSignature request.

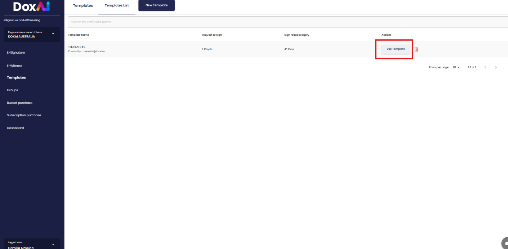
Use Template - The user can select an existing template either from the Template Dashboard or during the process of creating a new eSignature request. To proceed, click on the “Use Template” button associated with the desired template.
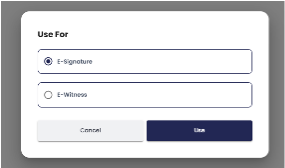
After selecting “Use Template,” the user will be prompted to choose the purpose of the request.
Please select “eSignature” from the available options in the Use For pop-up window.
Click “Use” to proceed.
Using a template mirrors the process of creating a new signature request, with the added benefit of pre-positioned fields in the document to streamline the workflow.
Was this article helpful?
That’s Great!
Thank you for your feedback
Sorry! We couldn't be helpful
Thank you for your feedback
Feedback sent
We appreciate your effort and will try to fix the article