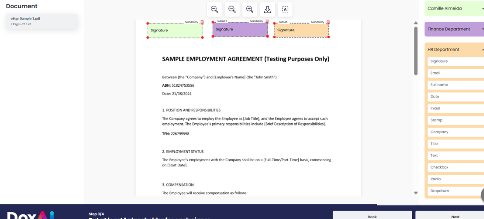
To complete the eSignature setup, ensure that each signer has at least one assigned placeholder such as a signature, date, or text field on the document. This ensures that all signers know where and how to interact with the document during the signing process.
Please note:
To add fields to the document(s), simply drag and drop them into the document.
Each field can be deleted or repositioned anywhere in the document(s) by dragging and dropping.
After all the placeholder fields have been configured at the desired locations, the user can click on “Next” to proceed to the next stage of the request.
Viewer Screen Functions:
The viewer screen is where you prepare and review your document before sending it for eSignature.
The screen offers two functions:
Field Selection Panel
Document Selection Panel
Viewer Toolbar
Field Selection Panel
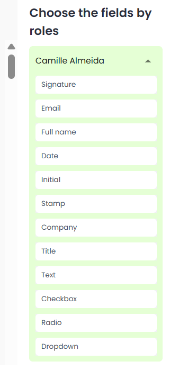
The Field Selection Panel allows the user to assign fields to each signer/group(s). The user can choose a signer/group and then drag fields like signature, date, text or checkboxes onto the document. This ensures each signer knows exactly where and what to fill out or sign.
Description of each Placeholder field:
Signature | Purpose: Allows Signer to add signature. Field Settings: Can be set as mandatory or optional. |
Purpose: Allows Signer to add email. Customisation: Can choose a custom font and text colour. | |
Full name | Purpose: Allows Signer to add full name. Field Settings: Can be set as mandatory or optional. Customisation: Can choose a custom font and text colour. |
Date | Purpose: Allows Signer to add date. Field Settings: Can be set as mandatory or optional. Customisation: Can choose a custom font and text colour. |
Initial | Purpose: Allows Signer to add initial Field Settings: Can be set as mandatory or optional. Customisation: Can choose a custom font and text colour. |
Stamp | Purpose: Allows Signer to add a stamp. |
Company | Purpose: Allows Signer to add company. Field Settings: Can be set as mandatory or optional. Customisation: Can choose a custom font and text colour. |
Title | Purpose: Allows Signer to add a title. Field Settings: Can be set as mandatory or optional. Customisation: Can choose a custom font and text colour. |
Text | Purpose: Allows Signer to add a text. Field Settings: Can be set as mandatory or optional. Customisation: Can choose a custom font and text colour. Validations: Can set a Validation Type (Digits Only, Letters Only, Alphanumeric, or Any Character), and optionally define a Min Length and Max Length for the text entered. |
Checkbox | Purpose: Allows Signer to add a checkbox. |
Radio | Purpose: Allows user to choose from predefined options before signing a document. The signature requester can rename the group label, add tooltips, and specify a value for each button. |
Dropdown | Purpose: Allows Signer to choose from a dropdown list. The signature requester can predefine multiple options for the dropdown. |
Subset (Only available for Group) | This feature enables granular control over group-based signing by assigning individual responsibilities within a group. By clicking on a field, the user can select which subset the field will be allocated to. |
Document Selection Panel
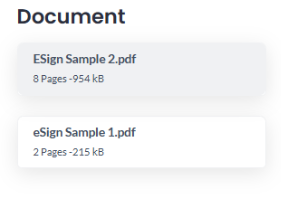
The Document Selection Panel, located on the left side of the viewer screen, displays all uploaded documents included in the eSignature request. It allows users to easily switch between documents, preview their contents and add field to each one as needed.
Viewer Toolbar
The Viewer Toolbar, located at the top of the screen, provides essential tools to help the user interact with and prepare document. The available tools adjust depending on whether the PDF is static or interactive.
In case of static PDF’s, the toolbar includes the following functions:
Zoom Out – Reduce the document view size.
Reset Zoom – Adjust the document to fit within the viewer.
Zoom In – Enlarge the document view.
Download – Save the document locally.
Text Field Edit – Allows the user to insert a text box anywhere in the document, with options to increase the font size and apple predefined bullet styles.

In case of Interactive PDF”s, the toolbar includes the following functions:
Zoom Out / Reset Zoom / Zoom In – Control the view.
Download – Save a copy of the document.
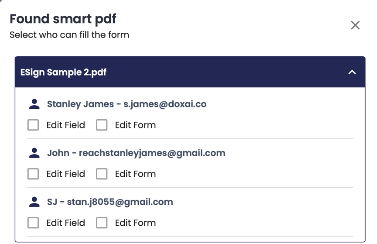
Editor Dialog – Opens a “Found Smart PDF” popup window, allowing the requester to define which signer/group(s) can edit specific fields or the form as a whole (See below)
Toggle to switch between “Edit PDF or Add Placeholder Fields”– switch between PDF Edit Mode (to edit existing form fields) and Placeholder Mode (to place signer-specific fields like signature, date, text, etc.)
Save – Save your progress and changes.
Text Field Edit – Allows the user to insert a text box anywhere in the document, with options to increase the font size and apple predefined bullet styles.

Was this article helpful?
That’s Great!
Thank you for your feedback
Sorry! We couldn't be helpful
Thank you for your feedback
Feedback sent
We appreciate your effort and will try to fix the article